Part of the fun of having my new Scion xB is
installing the various accessories available for it.
Shortly after purchase
I bought the official floor mats
and trunk mat.
Then later I had the fog lights installed.
Today in the rear cargo area,
They are useless till you
purchase the cargo nets.
I wanted to save about $100 in labor to
Shortly after purchase
I bought the official floor mats
and trunk mat.
Then later I had the fog lights installed.
Today in the rear cargo area,
it was time to install the
C-Pillar Cargo Storage Nets.
I ordered them from a Scion dealer
out of state because of their better pricing.
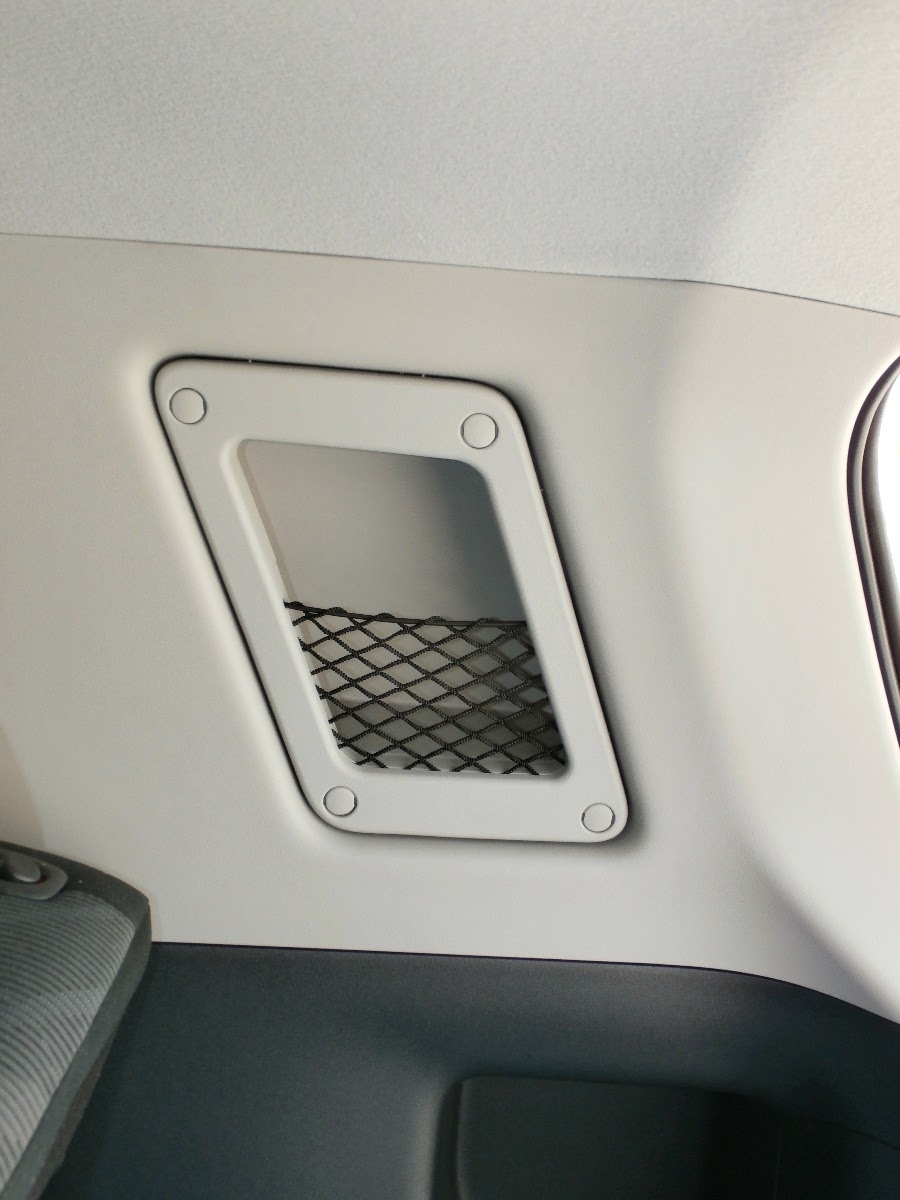
The Scion xB comes with these little niches
on each side of the rear c-pillars.
They are useless till you
purchase the cargo nets.
I wanted to save about $100 in labor to
have them installed and do it myself.
And finally the caps,
It requires drilling and that's a little intimidating,
but after reading a few online how to posts,
I reckoned I could do it.
Locating a 15mm (or 9/16) hole saw
was the most difficult process,
I had to special order it online from
the shank mandrel for $5.99 HERE.
Free shipping if it goes to your local store.
The mandrel holds the hole saw onto the drill,
and will saw a 15mm disk out of the car.
Yikes!
The kit comes with the paper templates
needed to show you where to drill.
as well as simple directions.
I started by taping the templates
into the appropriate corners,
on both sides.
Then I grabbed a punch all,
for punching the starter holes.
After all four holes where punched
I removed the templates.
Next I had to drill starter holes with a 4mm
(5/32) bit.
I couldn't find a recommended drill stopper,
so I just depended
on my ability to not drill too far in.
Success!
Be sure to lay a drop cloth down to catch
all the curly shavings.
Now the scary part...
the hole saw!!
A very tense moment....
PHEW!...
Hey there's a steel threaded hole in there
waiting for my cargo nets!
That hole was messy but in the right place.
After I cleaned them up, I was ready to
insert the net frames
Here are the M6 X 36 bolts
The net frame pegs lineup perfectly
and the bolts screw right in!
And finally the caps,
they pop right in,
and finish the look.
SWEET!
After I finished one side completely
I repeated the steps on the other side.
Here's where the mishap happened!!!
I let the hole saw go too far in on one hole
and it nicked the threads on the inner hole.
Then I damaged the the tip of the
bolt threads trying to force it in.
A very sick feeling came over me.
I thought all was lost till
I called my Dad and he suggested a tap.
?
What's a TAP???
I ran to The Home Depot and found this...
It's a Tap and Die kit for fixing threads.
It carves threads back into bolts and holes.
Tap for holes and Die for bolts
This little kit was for metric and had
a 6M size set, just what I needed.
It worked like a charm!
Best $17.97 I ever spent.
Thanks Dad!
Aren't dads the best?
Once that trauma was over I finished up
this side of the cargo area.
Ta-Daa!
The big question is what to use these
C-Pillar Cargo Nets for?
Then I got an idea...
They were perfect
for carrying some....
Easter Eggs!
Double Ta-Daaa!!
Thanks for stopping in and
hope you're having a
great Easter season!


4 comments :
Great job, Adam. Nice you mentioned Dad.
That is ridiculous! Are you saying you are the Easter Bunny?
No, I'm not THE Easter Bunny, but I help out where I can. LOL
Sweet thanks for the info, Was looking into buying a set but was lost on how to install them. Now I know and will most likely be installing some soon.
Post a Comment